Generate raster tiles from QGIS project
The code below uses the Toolbox SDK, which you can install with pip install toolbox-sdk.
Additional Python examples: using SDK, using Requests. If you prefer other programming language or need full API reference, check out Toolbox OpenAPI as well.
Docs
Generate zipped raster tiles from an archive with QGIS project and data.
Inputs:
ZIP file containing QGIS project and data files;
Polygons file - Optional file with polygons. Tiles will be generated for each polygon and stored into one catalog. This may be faster for non-rectangle regions;
Extent. If empty, a combined extent of all layers will be used. It may unexpectedly calculate an extent of the entire planet, then the tool will take a lot of time to process. Options to set the extent are: 1) upload a file with polygons - it’s handy if you need tiles for a complex area, along a coastline, for example, 2) mark it on a map, 3) draw it on the map and then correct the numbers or 4) enter the extent manually following the format ‘xmin, xmax, ymin, ymax’. Enter coordinates in WGS 84 (EPSG:4326), for example
-7.3,42.1,10.5,50.5;Min zoom level - between 0 and 25, the default value is 0;
Max zoom level - between 0 and 25, the default value is 9;
-
Output format - pick one of the options from the list:
PNG - ZIP-archive with PNG tiles;
JPG - ZIP-archive with JPG tiles;
MBTiles (mbtiles) - single .mbtiles file with PNG tiles inside;
DPI - image resolution in dots per inch, between 48 and 600, the default value is 96;
Quality for JPEG - the level of image compression between 1 (more compression, low quality) and 100 (max quality), the default is moderately compressed, 75;
Metatile size - between 1 and 20, the default value is 4;
Tile height in pixels, the default is 255;
Tile width in pixels, the default is 255;
Background color in RGBA, if not specified, 0,0,0,0 (transparent) will be applied.
Output:
MBTiles file or ZIP archive with tile images organized into folders.
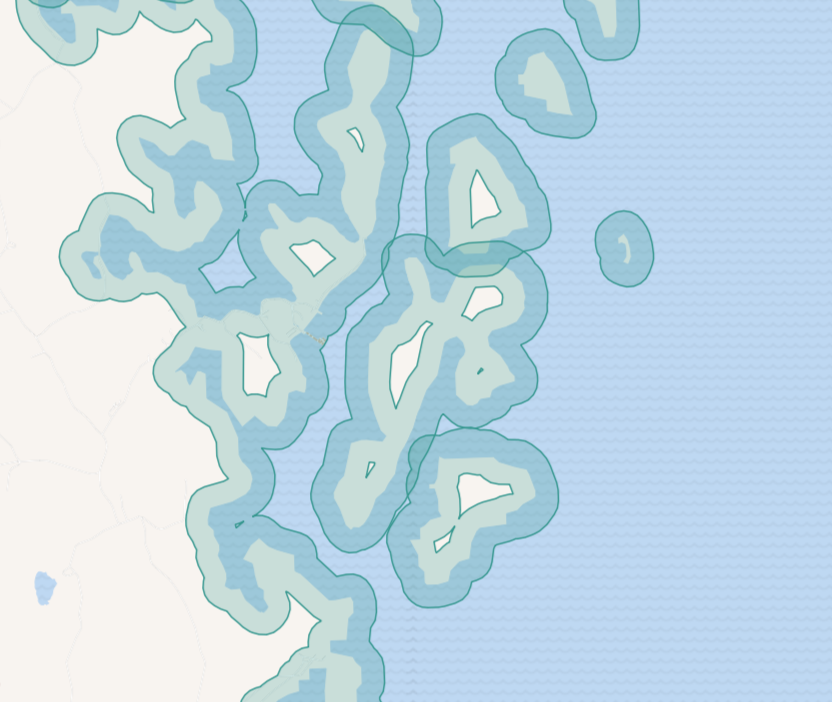
Example polygons with complicated geometry used to calculate the extent
Try the tool in action
Click on the Demo button above the tool form. The fields are filled in with demo values.
Click on the Run button.